Tuesday, March 1, 2022

What Is Color Separation For Screen Printing - Cre8iveSkill


Color separation for screen printing is a process through which artwork or a design is separated into different color segments. In order to create a design on any product, it is important to separate the colors first as this is a crucial part of screen printing. Recently there has been software that helps in making the whole process easier. 

Why Go For Color Separation?

The goal of the color separation procedure is to prepare the file for printing. The type of color separation procedure used is determined by the image and the surface it will be printed on. Color separation software divides images into the individual elements required to recreate them. 

Types Of Color Separations:

Understanding the various sorts of separations and the difficulties involved can assist you in doing successful separations on a regular basis. Although mastering successful color separation might take years of practice, screen printers can make the process considerably easier with the correct screen printing software.

Knowing which of the procedures below will work best for your design will help you reach the greatest outcomes. It is also crucial to have access to reliable screen printing software. Color separations used in screen printing include: 

● Spot Color Separations:

In screen printing, spot color separations are the most popular separation method. Spot color separations can range from vector conversions or raster logos to cartoon graphics, with each shade printed separately with its own ink. It may include the use of halftones for shade. Spot Colors provide for more precise color management while printing.

The appearance of spot color separations might be simple or complex. Some extremely complicated designs will fit on a press and print as a spot color job. Spot Colorwork with too many colors for the press can also be split up into simulated process files.

●  Four-Color Separations:

To print an image, this color separation technology involves four colors: cyan, magenta, yellow, and black (CMYK). Most of the colors in your image can be created by printing these four tones. Halftones, or small dots, are used in four-color process separations to create photorealistic images.

However, it can be challenging with darker backgrounds because the inks are translucent, this procedure works best on white or lighter backgrounds. Due to the system's color accuracy, it has been substituted as a preferred separation option during the last decade by the spot color simulated process. 

● Simulated Process Separations:

Simulated process separations, like four-color process separations, utilize halftones to form images, but the simulated process uses a bigger range of colors to handle a wider range of colors. Since opaque inks are utilized, a simulated process can be used for both light and dark backgrounds, unlike four-color process separations.

Tonal or channel separations are other terms for simulated process separations. In addition, simulated-process color separations similar to four-color process separations, are done in color separation photoshop. Simulated Process Screen Printing used for apparel, Garments, custom t-Shirt Printing.

● Index Color Separations:

To achieve color shading in index color separations, square pixels of the same size are used instead of halftone dots. Process separations can be more difficult to perform, print, and index than color separations. A photorealistic print, on the other hand, often requires the use of more colors. The separations are done in Photoshop, but images from other applications like CorelDRAW or Illustrator can be readily transferred.

To make it look as close to the original design as possible, the squares are utilized for color shading with a restricted selection of colors, usually the most prominent colors in the image. Although in order to compete with Sim Process or Four-Color Process for custom screen printing, you will need a bigger press and a lot of colors.

Depending on the press and design needs, a color separation may use a combination of these separation approaches. A process of color separation, for example, will benefit from the inclusion of a spot color to expand the color range.

A process color or a customized spot color may be included in a simulated process print as needed. Due to varying printer/design requirements, customized color separations are frequently employed in practice. 

Tips For Successfully Implementing Color Separations

A smart way to achieve high-quality color separations that result in precise, clear screen prints is to develop and repeat a color separation procedure. Individual screen printers will develop their own challenges and preferences when it comes to making separations.

However, if you identify and stick to a technique that works for you and pay attention to potential issues, you can boost the success rate of your separations and reduce waste in your business. Following are some tips to further optimize the whole process:

● Make sure that you use a high-resolution image for the best color separation services.

● Recognize the colors that will be part of color separation and identify the problems that may come along. For instance, separation of opposite or unusual colors.

● Select colors one by one and extract them. To avoid overlapping the layers of ink, you can remove the color that is less optical.

● Identify the issues that you may face while performing this procedure depending on the process that you choose to go with and eliminate them. For instance, more colors may appear in the image that you did not expect to see. Since Photoshop's default CMYK palette is designed for printing on paper, you may need to import your own CMYK palette. When you import a vector image into Photoshop, the program's anti-aliasing feature may automatically soften the edges, which you will need to reverse. Ideally, you must be aware of any potential issues that your sort of color separation may encounter, and be prepared to address them head-on during the separation process.

While color separation online or otherwise is an important part of the manufacturing process, screen printers understand that there is still a lot of work to be done in order to produce a high-quality print from the pictures they have isolated. Once you have confirmed that your color separation was successful, follow screen printing best practices to achieve a high-quality print. Cre8iveSkill provides the best color separation services for screen printing. Explore more services. 

Source: https://www.cre8iveskill.com/blog/what-is-color-separation-for-screen-printing

Wednesday, February 23, 2022

The Complete Guide To Vector Art | Cre8iveSkill


As you scroll through your social media feeds, it’s hard to miss the influx of vector art taking over. From advertisements to movie posters, this modern trend is hard to ignore. But what is vector art? And why is it such a popular choice among businesses and creatives?

We all know what art is. It’s the Mona Lisa, it’s that painting of the boats on the river in Venice, and it’s the statue of David. If you’re like most people, you probably think of vector art as being something that’s been around for a long time. You’d be right - vector art has been used in advertising and design for decades.

But what is vector art? Many people don’t even know it exists, and those who do often think it’s just a lesser form of “real” art. You may not know that vector art is becoming more and more popular today.
In this blog post, we’ll explore the definition of vector art, its benefits, and some examples of how you can use it in your own work! 

Here’s What Vector Art Actually Is


Have you ever seen the logo or graphic for a company and been so impressed with its beauty? It was most likely created using vector artwork. Vector arts are made up of thousands of small shapes called vectors (clean lines drawn precisely as desired) - resulting in more aesthetically pleasing designs!

In short, vector art is created by using mathematical formulas to define points in two-dimensional space. These points are then connected by curves, resulting in a clean, cohesive image. Unlike traditional forms of art, which rely on tangible media like paint or charcoal, vector art can be displayed electronically without any degradation in quality.

Vector artwork is a great way to create designs that can be endlessly customized. With each element of the design being manipulated separately, you have incredible control over how your sign or logo will look in various formats without having any worrying fidelity issues like gradients suddenly becoming blurry when reduced downsized too much.

The bottom line is – vector means permanent. 

Why Is Vector Art Becoming More Popular Now


Looking for a way to stand out from the rest? If so, vector art may be the perfect solution for you.

Vector art design is a modern trend gaining popularity among artists and business people alike. Unlike traditional art forms, vector art can be scaled to any size without losing quality. This makes it the perfect medium for creating logos, illustrations, and other graphics.

There’s no doubt that vector art is on the rise. Graphic designers are discovering the unique capabilities of vector art software, and the results are stunning. Vector art, in general, is an illustration made up of geometric shapes that can be manipulated to create any shape or image you like.

You see it more and more often in commercials, on websites, and in other forms of digital media. Thanks to its growing popularity, dozens of software programs are explicitly designed to create vector art.

In addition, online communities have sprung up around this medium, providing businesses with vector artwork services and consultation. If you are thinking about getting some help, we assure you that none surpasses Cre8iveSkill. 

Different Vector Image File Types


To understand vector image file types and formats, you must first understand what vectors are. As I have already mentioned earlier, vectors are mathematical objects that allow the creation of shapes with points and curves.

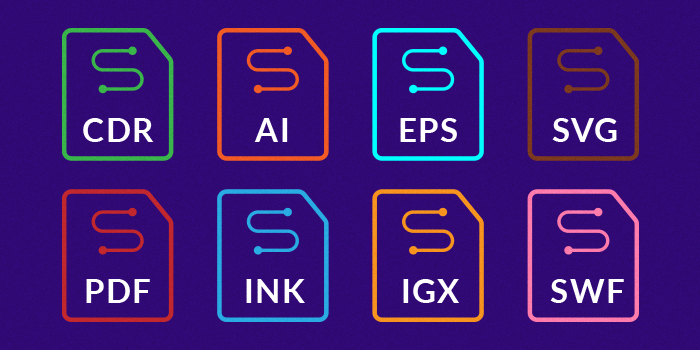
Vector file formats store graphics as vectors, allowing you to edit them at any size without losing quality. There are dozens of vector file formats, but some of the most popular ones include SVG, EPS, and AI, each with its own unique uses.

If you need to create or edit vector graphics, it’s important to use a vector image file type. 

• AI 

Short form for Adobe Illustrator. It is a great tool to use if you’re looking for an artistic touch on your vector art project. The AI file type is usually used in print media and digital graphic designing, such as logos.
This file format is best suited for creating logos and illustrations.

• EPS 

Short form for Encapsulated PostScript. The EPS file format has been around for quite some time, and it’s an older type of vector graphics that don’t support transparency as more modern files do.
The EPS file format is mainly used for print design.

• PDF

The Portable Document Format was designed to exchange documents across platforms and is editable in Adobe Acrobat.

• SVG 

The Scalable Vector Graphics format is often used on the web to create stunning visuals for websites and ads. It’s based on XML (a markup language readable by both machines and humans) which can be indexed. 

How Can You Benefit From Vector Artwork?


Is there anything more frustrating than spending hours on a project, only to have it look terrible when you’re finished? If you’ve ever felt that way, you’re not alone. In fact, many people struggle with creating high-quality art. But what if there was an easier way? Vector art can help you create stunning visuals with ease.

Believe it or not, there are many benefits of using vector art over traditional artwork methods. Here are just a few: 

1. Vector art is scalable: 

This means that it can be enlarged or reduced without any degradation in quality. When you use traditional artwork methods such as Photoshop or Illustrator, the image becomes pixelated when it’s enlarged. However, with vector art, your image will always stay sharp and clear. 

2. Vector art is easy to edit:

You can easily make changes to your designs without having to start from scratch. You can change colors, shapes and even add text without affecting the quality of the image. 

3. Vector art is versatile: 

It can be used anywhere, from print to electronic media. Whether you want to use it on a huge advertisement board across the road or make a commercial video ad using vector artwork, it is up to you. 

4. Vector art is web-friendly: 

Vector artworks are search engine friendly since search engines can easily index them. They have smaller file sizes, allowing the web pages to load much faster and provide an optimized experience. 

5. Vector art is clean and professional: 

Unlike raster graphics (which are made from pixels), vector images are crisp and sharp with no blurred details and visible pixels. The clean designs allow the images to be much more aesthetic than raster images. In addition to that, vector artwork looks more professional. 

6. Vector art is more creative: 

With vector graphics, there’s no limit to what can be designed. No more worrying about resolution size or how an image will look on different screens; this allows designers the freedom they need in order to make their creativity shine through without any trouble at all, with quality preserved throughout. 

7. Vector art has more industrial uses: 

Vector art is relevant in many different industries. For example, interior designers often use vector art when designing office spaces. Home decorators enjoy using them for layout projects like furniture arrangement or color schemes; fashion houses now incorporate varying forms into their clothing lines. 

How To Start Creating Vector Art And Become A Vector Artist

One of the most pleasant and thrilling creative products is vector graphics. Playing with shapes and colors is a sheer joy once you've mastered the basics. The first step in becoming a vector artist is to select a vector design software.

There are many options on the market, some of which are free and others that are charged, but Adobe Illustrator is the industry standard. To begin, you can select any program that meets your requirements. Once you've decided on a software package, study the fundamentals of tools such as the pen tool, basic geometric forms, brush tool, pencil tool, and so on.

The process of vector illustration is a lot of fun. You can create work that is both dramatic and eye-catching, as well as subtle and elegant. It takes effort and dedication, just like anything great in life. However, if you start with a basic understanding of the tools, such as the pen, shape, and brush tools, and then go on to learn about and experiment with other tools and effects, you'll be well on your way to generating great vector graphics in no time.

There are plenty of online resources for learning about vector illustration, as well as amazing artists who create jaw-dropping artwork to motivate you to pursue a career as a vector artist. It's only an issue of time and dedication as to how much effort you put into being a vector artist.

Making vector illustrations is a great way to show off your creative skills. Vector digital art is produced by vector graphic design software by using mathematical formulas to generate simple shapes between points instead of combining millions of pixels.
To create vector artwork, different points are created, also called nodes. Those nodes are then joined together using lines (or paths) to build different shapes. 

Here’s How You Can Start Creating Your Own Vector Art 

1. Choosing The Software

Vector graphics software is a powerful and versatile tool that allows users to create stunning designs and manipulate images using geometric and mathematical commands. You can choose any vector software you like, but keep in mind that it should.

• Provide you with all the vector image editing tools and options

• Allow you to export multiple file types that are associated with vectors.

The most commonly used vector graphics software include: 

Paid 

Adobe Illustrator, CorelDRAW, DrawPad, Canvas X, Figma 

Free 

Sketch, Inkscape, Krita, Boxy SVG 

2. Mastering The Tools & Shapes

One of the first and most important things to learn as a vector artist is becoming proficient at the use of pen tools, basic shapes, and operations like Pathfinder.

Once you get accustomed to that, master the use of colors, pencil tools, and brushes of different types to trace or draw freehand.

Knowing how and which shapes to add and working with layers is also crucial to creating flawless vector artwork.

There are generally three things you should always keep in mind while creating a vector image. 

1. It Should Be Clean

Your vector art design should not be cluttered. A cluttered design is often hard to read because there are too many redundant elements. It would also make a vector image harder to edit or change. 

2. It Should Be Simple

Making a vector image is all about simplicity. Nothing complex is required. Simple shapes would get your work done. 

3. It Should Be Bold

The overall vector design needs to be bold to have your vector lines and nodes click together. Use good color schemes to ensure that the designs are aesthetic. 

What Tools Can Be Used To Create Vector Graphics


Have you ever seen those fantastic-looking vector graphics and wished you could create something like that yourself? Well, you can! There are several tools available to help you create vector graphics. In this section, we’ll take a look at some of the most popular tools. 

1. Adobe Illustrator

Illustrator is perhaps one of the most used software for creating vector artwork and graphics. Its vector tracing and creation only require a few clicks. 

2. Krita

Krita is an open-source graphics editor that has become a pretty handy tool for creating, importing, and exporting vector graphics. 

3. Boxy SVG

It is one of the simplest and most lightweight tools that gives you all the basic options to get straight into making vector graphics without much complexity. 

4. Inkscape

Inkscape is one of the best open-source vector editing software that professionals use. It gives you unlimited manipulation options to create flawless vector graphics.

5. Vectr

Vectr is a good online software that beginners can use to create vector artwork. The less complex and basic UI gives it an upper hand for all the entry-level vector editing options like borders and shadows. 

6. LibreOffice Draw

It is a great vector editor with just the right tools for editing vector images with technical drawings such as flowcharts, diagrams, and tables. 

Use of Vector Art in Different Industries


There is no doubt that vector art has revolutionized the world of graphic design. Its sharp lines and clean shapes make it the perfect medium for creating high-quality illustrations and logos. But what many people don’t realize is that vector art can be used in a variety of industries, There are so many industries that thrive due to graphic design.

In this section, we’ll take a look at some of the different ways vector art can be used to get amazing results in various industries. 

Embroidery Digitization 

Embroidery digitizing is the process of transforming a graphic image into stitches that can be sewn onto fabric. While there are many different ways to create digital embroidery files, vector art is often used because it is easy to create and edit. 

Textile Industry

There is a constant need for new and innovative designs in the textile industry. This is where vector art comes in. Vector art is a type of graphic design that uses mathematical equations to create images. This makes it perfect for creating intricate designs that can be used in textiles.

Additionally, because vector art is created using math, it can be scaled up or down without losing any quality. This makes vectors the perfect choice for use in textile design. 

Marketing Industry

Designers often use vector art in advertising and marketing materials. It can be used to create a logo or as part of a larger graphic design. Vector art is resolution-independent and can be enlarged or reduced without losing quality.

This makes it an ideal format for printing large graphics or displaying on electronic devices with different resolutions.

When it comes to images, there are two main types: raster and vector. Each has its own strengths and weaknesses, which is why it’s essential to understand the difference. We’ll briefly look at vector vs. raster images in the next section. 

Raster Vs. Vector – How Raster Images Are Different From Vectors


We all know what images are – a visual representation of something, usually on a screen or in print. Images can be photographs, illustrations, or even designs. You’ve probably seen both raster and vector images before, but do you know the difference between them?

Raster images are a thing of the past because they’re outdated, difficult to use, and don’t meet today’s customer needs. They’re hard on the eyes too. On the other hand, vector artwork is easier to edit and scale up or down while maintaining quality. Designers are now using vector-based solutions for modern projects for these reasons.

In this section, we’ll take a look at the differences between raster and vector images and explain why vector art might always be preferable to the other. 

Image Enlargement & Enhancement:

Raster Images 

When it comes to scaling the raster images, the final results are pretty disappointing. The enlargement causes a significant decrease in quality, so you can’t scale up without losing some detail.

Vector Images 

Because vector art is made from mathematical equations, it can be scaled to any size without losing any quality. This makes it perfect for logos and illustrations, which need to be displayed in different sizes.

Image File Size:

Raster Images 

With raster graphics, you are storing an entire image rather than just the outlines of your design. This takes up much more storage space, making the raster files pretty large.

Vector Images

When it comes to filing size and storage space, vector images take up much less space and have a smaller file size than their raster counterparts. 

Designing Process:

Raster Images 

The time spent rendering raster pixels takes too much effort than designing the customizable vector paths. Editing photos/PDFs converted back into RGB values is laborious at best. With the rise of digital printing, raster designs became less popular because they are difficult to edit and incorporate changes. 

Vector Images 

On the other hand, vector artwork allows faster modifications and edits. The rise of vector graphics led to an almost overnight revolution in design, giving us much more flexibility and ease when it comes time for editing or creating new designs. When working with them, you don’t need as much patience, time, effort, or skill. 

Cost-Effectiveness:

Raster Images 

As raster images take a lot of time and effort to incorporate any changes or editing, their production, enhancement, and edits are more expensive than their vector counterparts. 

Vector Images 

Vector artwork allows you to create intricate designs without putting too much effort in, which means you can get your designs done faster and cheaper. 

Why Choose Cre8iveSkill for Your Vector Artwork

When it comes to getting the best of vector art, you need someone who understands your needs and requirements while providing quality services at an affordable price. Going for Cre8iveSkill’s excellent Vector services will ensure that there are never any regretful decisions.

Cre8iveSkill understands your needs and is committed to providing the best service for a great price. We are not just any artist; we take time with each client so you can have beautiful vector art that reflects who YOU are!

With our top-notch expertise, use of online tools, and quick turnaround time, you can get your vector designs in a much more cost-effective way.

Source: https://www.cre8iveskill.com/blog/what-is-vector-art

Thursday, December 30, 2021

Best Thread For Sewing Machine For Machine Embroidery Design


Thread weight is not just a number. It's the thickness of thread that will be used for sewing. From finest to heaviest, the weights range from 8 to 40 weight. Many factors affect the selection of the best machine embroidery threads. These include the type of fabric, needle size, type of stitch, and other factors like age and condition of the machine. A machine embroidery kit often includes several thread brands and weights, so that you can find the best embroidery thread for your machine. However, knowing the basics of thread weights is important to choose the correct one! That’s where we come to your rescue! Read on to know what thread weights should you use for machine embroidery. 

You Need To Know That…

Embroidery machines usually come with a range of recommended thread weights for the different features. The best way to determine which thread weight you need is to test them out. Choosing the wrong thread weight can result in poorly sewn seams or a machine that won’t sew at all. The most popular types of threads are mercerized cotton, polyester, and nylon threads. Mercerized cotton threads are strong which makes them perfect for jeans stitching where they should withstand poking by a pointy object like a pin or needle. Polyester threads are strong, but not as strong as mercerized cotton. Machine embroidery thread is a set of threads, often two strands twisted together. Threads for machine embroidery can vary in weight, and there are many different types of thread to choose from regular sewing thread, extra-heavy-duty sewing thread, and heavy-duty sewing thread. 

Thread Weight Is A Measurement Of The Thickness Of A Thread. 

The weight should correspond to the material being sewn. The heavier the material, the thicker a thread needs to be. It is important to choose the correct thread weight for the type of embroidery machine sewing that you will be performing. If you sew lightweight fabrics then use a lighter thread weight, if you sew heavy materials then use a heavy thread weight. 

How To Read A Thread Weight?

When 40 kilometers of a thread weigh 1 kilogram, it is designated as 40 wt. Because it takes just 30 kilometers of thread to weigh one kilogram, a 30 wt. thread is heavier. Typically, when you look at a thread weight number, it would appear like 50/2 or 40/3. The misconception that the thread weight is a fraction is quite popular! However, the thread weight is only the first number; the second number is perhaps the thread ply. So, if you see 50/2 printed on a cotton thread, it indicates that the thread weight is 50 and the thread ply is 2. To put it another way, it's a thin and robust cotton thread. It's worth noting that if the ply is 2 or greater, the thread will be fairly robust and will stand up well to normal usage. 

Types Of Thread Weights

Regular sewing thread is typically used when using a regular needle or when using decorative stitches such as backstitching or cross-stitching. It is not recommended for use with heavier fabrics such as denim jeans or upholstery fabric. Heavy-duty sewing threads should be used in these cases instead. Some machines can use up to four spools of threads at once, each with a different weight (usually two). This means that in total there are eight possible combinations of thread weights to choose from! 

40wt Or 60wt, What Should I Choose?

Embroidery threads are often available in a variety of thread weights, the most popular being 40wt, followed by the finer and lighter 60wt. 40 wt. threads should be your go-to thread for general needlework. When creating patterns with fine details, use a 60wt thread. When a design demands tiny text or delicate detail, choose traditional Rayon No. 60 or Polyneon No. 60 threads. When stitching with a 60 weight thread, always use a 65 needle and increase density. 

40wt Thread:

If you're looking for a glossy embroidery thread, a 40 wt. the thread would most likely suffice. In reality, there are likely to be few machine embroidery tasks for which a 40 wt. thread isn't the finest option.

The most common alternatives for 40 wt. threads are rayon and polyester. Previously, rayon was thought to be the better option since it offered more shine and color options. On the other hand, it isn't as sturdy, would quickly break during stitching, and wouldn't hold up to regular laundering.

However, the polyester thread has continued to improve in terms of shine and color options and now provides almost as much diversity as the rayon thread. For experienced sewers who work on embroidered projects, this has made it the go-to thread for machine embroidery tasks. 

50 Wt. Threads:

The most common thread used by most sewers is a 50 wt. all-purpose thread. Polyester or a cotton-polyester combination is most commonly used. They're appropriate for a wide range of sewing projects and are quite durable.

But there's more to it than that. There's a 50 wt. all-purpose thread and a high-quality 50 wt. cotton quilting thread to choose from. Although neither would fail you when it came to stitching into clothing or quilts, the latter would be more superior, especially for quilting tasks.

This is because high-quality 50 wt. cotton threads are both resilient and thin, allowing you to piece a quilt without bulking the seams, resulting in considerably superior outcomes while working on quilting projects. These threads, on the other hand, are fantastic for appliqué, hand applique, hand piecing, and machine quilting. 

Anomalous Thread Weights Info For You! 

12 – 18 wt. Threads:

The 12 – 18 wt. threads aren't widely used, but they have a special function. They're a must-have for sewers who do a lot of hand stitching or topstitching.

When working on sewing tasks that need hand quilting or even hand embroidery, the 12 wt. thread is the finest choice. It wouldn't let you down when it came to topstitching denim.

However, like with other thread weights, quality is more crucial here, and this is something you should bear in mind while buying for 12 – 18 wt. threads. When using a low-quality thread for hand stitching or topstitching, the thread may break often, causing the garment to fray.

28 wt. Threads:

This thread is used for hand stitching and hand quilting projects as an alternative to the 12–18 wt. threads. It can be more suitable for sewers who prefer not to use a heavy thread for hand stitching tasks. 

60 wt. Bobbin Thread:

This is an extremely thin, very strong thread that is used in the bobbin for embroidery tasks that do not require the back of the project to be seen. 

Role Of Thread Weights In Digitizing

The majority of digitized patterns are made with 40 weight thread. This guarantees adequate embroidery coverage. When using a 30 weight thread, the larger width of the thread might give a lumpy look or cause the thread to bind on itself, breaking the thread or jamming the machine. Reduce the density by one-third or expand the design size by 125 percent of the original to remedy this. Increasing the stitch length will also be beneficial.

Tip: Always specify which portions of the pattern will be embroidered in 60 weights when having a design digitized so that the Embroidery Digitizing Companies may avoid having to apply the fill. 

Here’s Your Takeaway!

Choosing the right thread for embroidery is important as it will affect the quality of the finished product. The weight of a thread will determine how easily it can be threaded through a needle and how quickly it will break if too much tension is applied.

The type of fabric and project you are embroidering will determine what thread weight would be best. The most commonly used thread weights for machine embroidery are 40-weight cotton, 60-weight cotton, and 100-weight cotton.

Source: https://www.cre8iveskill.com/blog/what-thread-weights-should-i-use-for-machine-embroidery

Sunday, December 26, 2021

Create High-Quality Applique Embroidery Designs Using Computerized Embroidery | Cre8iveSkill


Applique is a long-aged sewing craft that uses thread and needle, in which fabrics are cut into different shapes and designs of varying sizes are sewn on a larger base fabric to form different designs. This craft is done by hand embroidery or by machine embroidery.

Creating Applique Designs

An applique is a form of embroidery, and it features a wide range of designs and can be achieved through different techniques depending on your choice. Applique embroidery designs can be done by hand and some on a sewing machine they are:

• Smooth edge applique
• Raw edge applique
• Reverse applique
• Decorative applique

Smooth Edge Applique

With the use of a sewing machine, the raw edges of the background fabric to be applied can be stitched around the shape in an attempt of getting it tidied with a chosen stitch to give a tidy finish that is smooth and neat to the user. A zig-zag stitch can give this result.

Raw Edge Applique

This design works well for ventures which will not be used frequently, as the raw edges would not be sewn over to create a seamless edge but attached to the fabric on the background. The fraying edges are left as it is. This design is ideal for smaller projects like greeting cards or wall-mounted pieces. Stronger and more durable stitches are used for items such as cushions or clothing. This design varies and can be molded according to what it is to be used for.

Multi-needle Hoop Applique

This technique is more specialized and rarely used. It is a stitching technique using a machine that requires the use of a multi-needle sewing machine as well as an embroidery hoop. Different colors, threads can be set up on the machine to be used. To create beautiful designs, each section of your design will be stitched accurately. It is best for quilting projects. This applique design is more suitable for those who have verse knowledge of embroidery.

There are different sewing machines used to achieve different types of applique embroidery designs.

Reverse Applique

As its name implies, instead of sewing fabric shapes on the background fabric, using this method you layer fabrics together on top of which you need to stitch a pattern. Then to reveal the shape and color Floral reverse applique, cut away parts of the fabric.

Decorative Applique

This technique is open to different variations and arrangements. It can be achieved using a machine. If you are making use of a sewing machine, you have the opportunity of making do with different stitching styles available to make your piece appealing to the eyes. Decorative applique can be as colorful or design as desired.

The Lowdown

There are different applique choices and variations at your disposal, this technique is one of the best that has been tried and tested. For those who love playing with colors and various types of fabrics, it is the best choice of technique. You discover the applique embroidery designs that best suit your embroidery project.

Applique designs can be applied in three main methods which include; Machine applique, Hand applique, and fused applique.

With the advancement in technology, Machine Embroidery Applique has come into play due to an increase in demand as the market has fully blown into the Fashion industry.

Machine embroidery applique is fast and easy but will always ensure that the applique embroidery designs are precise and perfect. Using fabric as the background of applique designs instead of a stitched fill reduces the number of stitches of a design drastically so you can use fewer stitches to stitch a larger design.

Choosing The Right Stich For Applique Machine Embroidery

This is the most important part of applique as this is what determines if your design will last longer. Gluing or fusing your applique pieces to a background fabric is nice, but gluing alone will eventually wear out and your wonderful design will fall apart.

Some of the most common stitches used with fusible applique are zig-zag stitch, blanket stitch, and straight stitch, notwithstanding, using different stitches can give a simple quilt look beautiful.

Zig Zag Stitch:

This is a common stitch but some machines come with multiple options for a zig-zag stitch. You can get a different look with a zig-zag stitch depending on the machine settings. One can be a satin zig zag and another can be a narrow zig zag.

Narrow (Fine) Zig Zag:

This stitch is bold but cannot be compared to that of the satin stitch. The narrow zig-zag can be considered as an invisible stitch. It does the job of securing the edges of the applique designs but won’t show as a solid line of thread. The stitch has a longer stitch length and a narrower stitch width.

Satin Zig Zag:

Its name originated from the fact that the stitches look like a piece of satin. It is a compilation of very thick and dense zig-zag stitches that are closely done making it hard to see any background fabric between the stitches.

Mostly the design gives you an idea of how to go about with the stitches.

Blanket Stitch:

This is a well-known method of stitching applique and it is made up of straight stitches along the outside edge of the applique which is accompanied by a perpendicular stitch into the applique design shape. This type of stitch shows the traditional hand applique stitching style.

 Most machines have multiple options for blanket stitches or might have none.

Straight Stitch:

This is an easy stitch type that may not be listed as part of stitches, but as the name implies it’s just a straight stitch.

Other stitches:

It is recommended that you create room on your stitch sampler and okay with different stitches and their settings. Blind hem stitch should also be tried in case you want to ever try out invisible machine applique embroidery and maybe decorative stitches.


Choosing the Perfect Thread Color for Applique Machine Embroidery


The color of the embroidery thread is one important aspect to put into consideration when doing an applique machine embroidery. You can try the following tips :

• The vertical stitch should be outside the edge of the shape when using a blanket stitch. The color of the thread should match that of the predominant color in the applique fabric and that of the background fabric if you find out that your applique stitches are drifting onto the applique shape as you work. By doing this, any mistakes will become less noticeable.

• Make use of a bold decorative stitch, when you don’t want to be bothered about lining the edges with needles. An example of decorative stitches is the star stitch and the rick-rack stitch.

• If the stitching is to be used as the overall design look of the quilt, use a thread that contrasts with the applique design and background fabric.

 In machine embroidery, when applying stitches to the digitization of the embroidery software, digitization converts the existing artwork into an applique embroidery designs file that can be run on the embroidery machine. In other words, embroidery digitization uses embroidery software to create a machine embroidery design file with a series of commands that tell the embroidery machine how to sew the applique designs.

When it comes to embroidery, the artwork alone is not enough. In order to embroider the design with a computer, only the design file can not meet the required purpose well. Although the artwork is also vital, in the process, another skill usually obscures the former’s skill. Yes, we are talking about embroidery digitizing. Like any other professional skill, the digitized file is prepared by a professional embroidery digitizer.

Nowadays, embroidery machines are very efficient and intelligent. The process is fast and quite automated. Nevertheless, this applique machine embroidery is not self-sufficient in interpreting the design. The machine cannot understand and embroider designs in simple digital format by itself.

Most clothing printing technologies can use and print from design files. Embroidery is an exception because applique embroidery designs are made up of stitches. Digitization is the answer to bridge this gap. The digital format of the design is its stitch representation. It divides parameters such as stitch position, stitch type, stitch path, and density across different areas of the design.

The responsibility for defining these parameters lies with the embroidery digitizer. The digital format of the design is created on a computer program, usually called embroidery digitizing software.

With the resurfacing of the term “automatic digitization”, which was introduced by a few embroideries digitizing software manufacturers. Regardless of its effectiveness, the term undoubtedly offers exciting prospects. The basic idea is to configure the software in a way that can be digitally designed without external input.

The design only needs to be entered, and the software will create a digital format of the design. Although this is interesting equipment worth thinking about, automatic digitization still has a long way to go. The software can recognize the design but still cannot define stitch parameters through different areas of the design. This still requires human intuition. Therefore, the role of embroidery digitizing services is still very important.

Source: https://www.cre8iveskill.com/blog/how-to-create-applique-embroidery-designs-using-computerized-embroidery